1/9 The Dark Knight Rises
This is a great beginner project for anyone new to model lighting. It demonstrates how a basic lighting system can transform a model into an eye-catching display piece.
This light kit is designed for use with the Crazy Toys 1/9 figure as shown, but could no doubt be incorporated for use in many of the Batman display models.
For this lighting project you will need:
1) The pre-wired set available from our store.
2) A 2mm and 5mm drill.
3) Three dot stickers (or equivalent markers).
4) One standard 9v battery.
Step 1
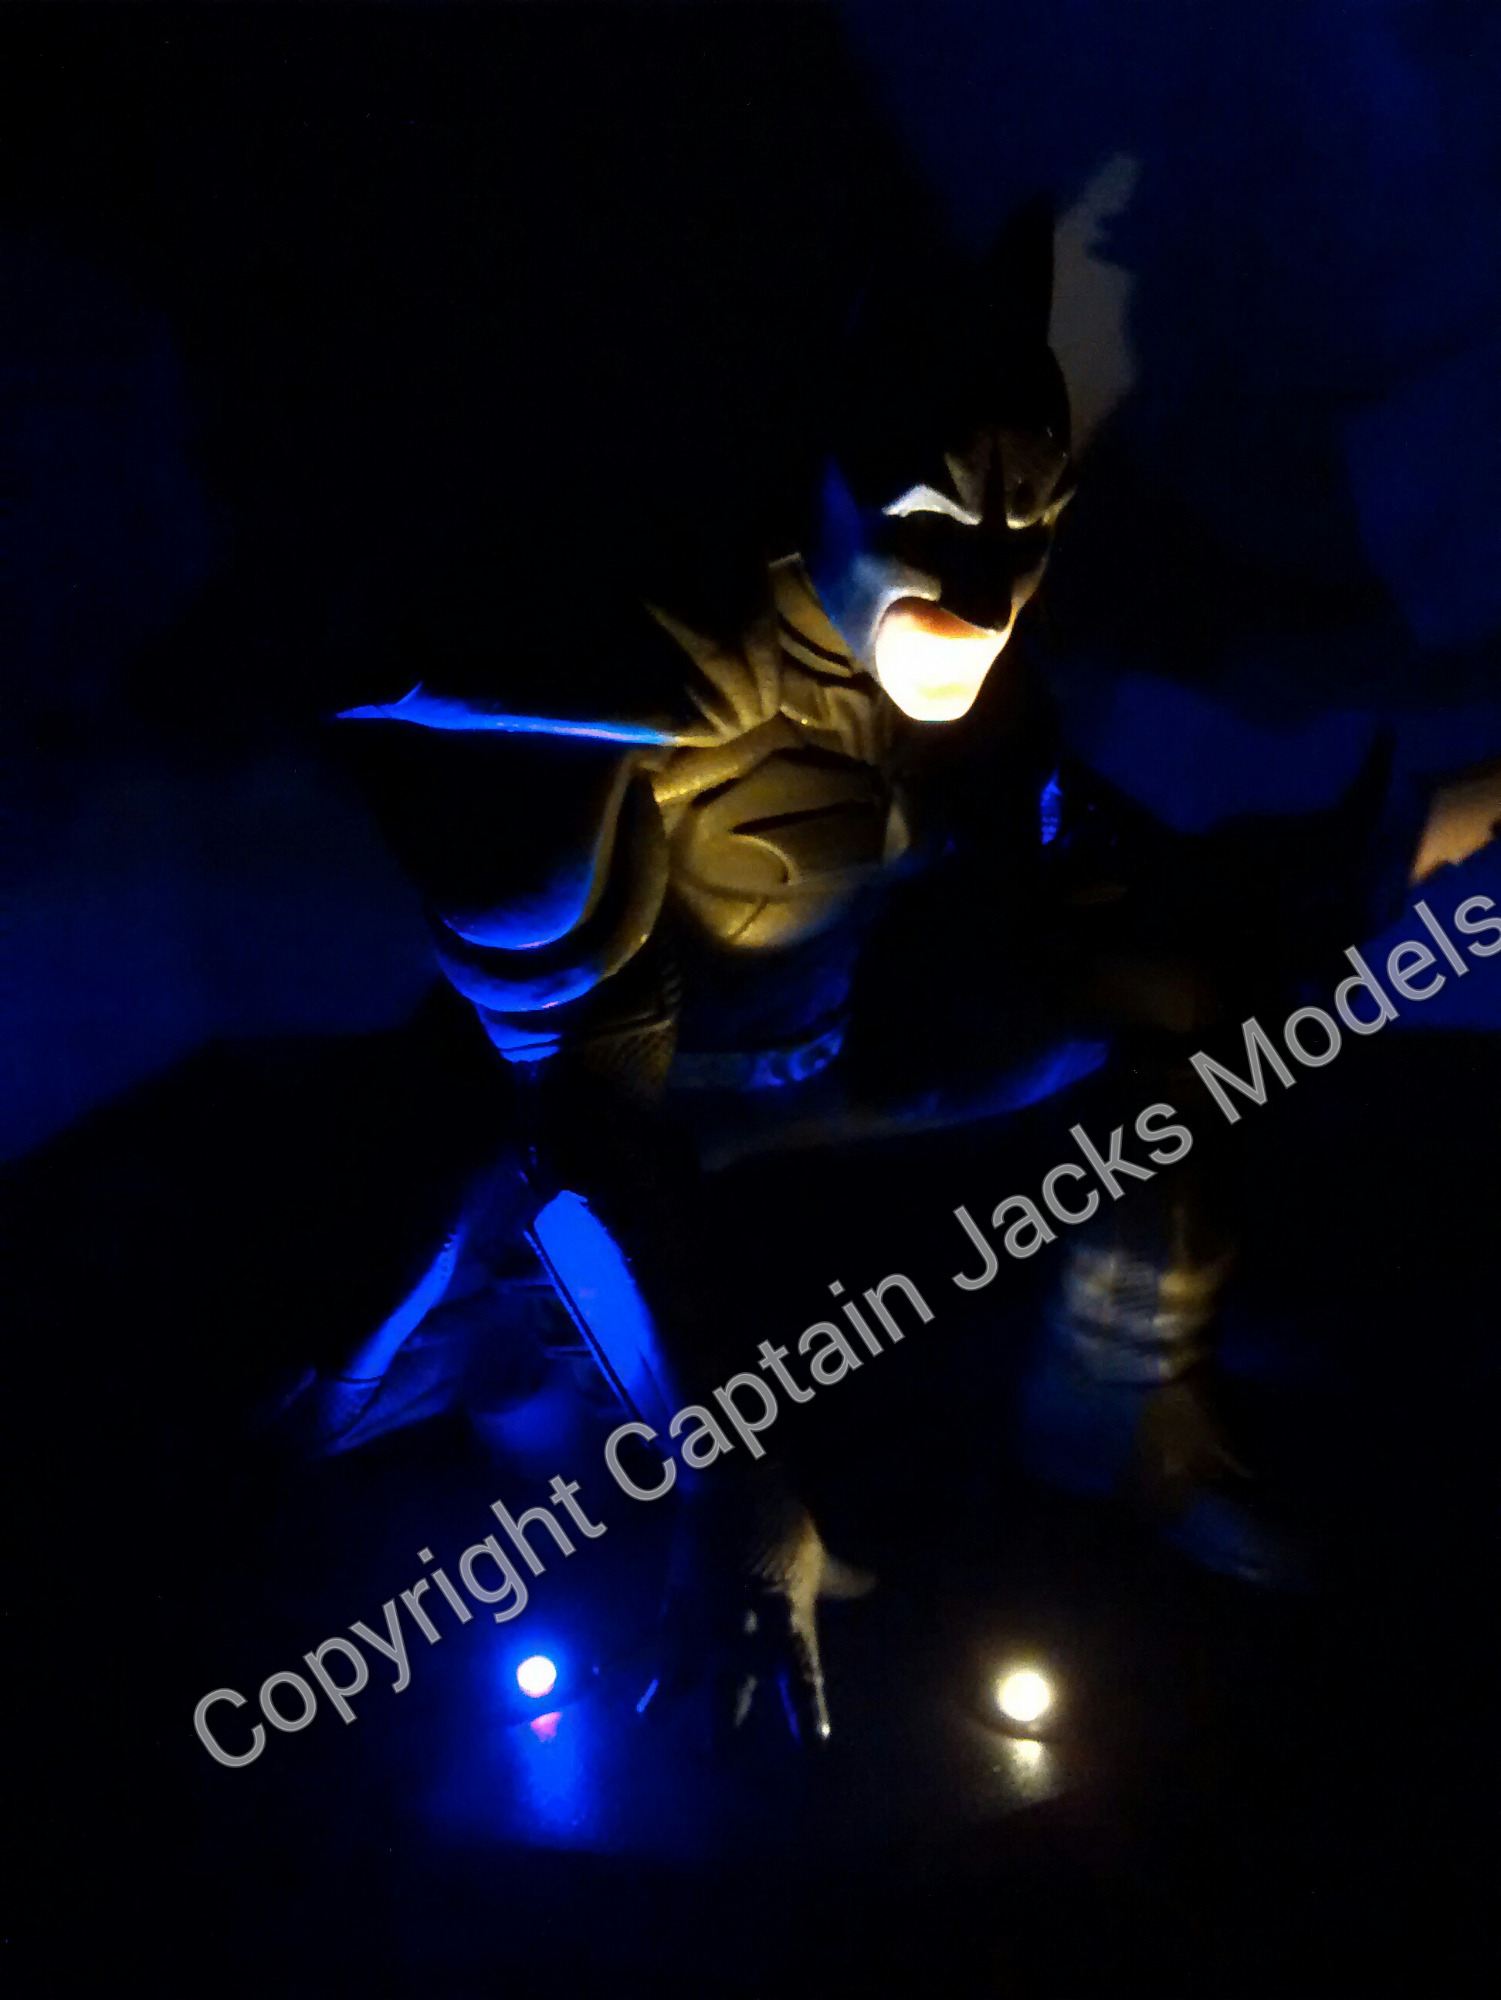
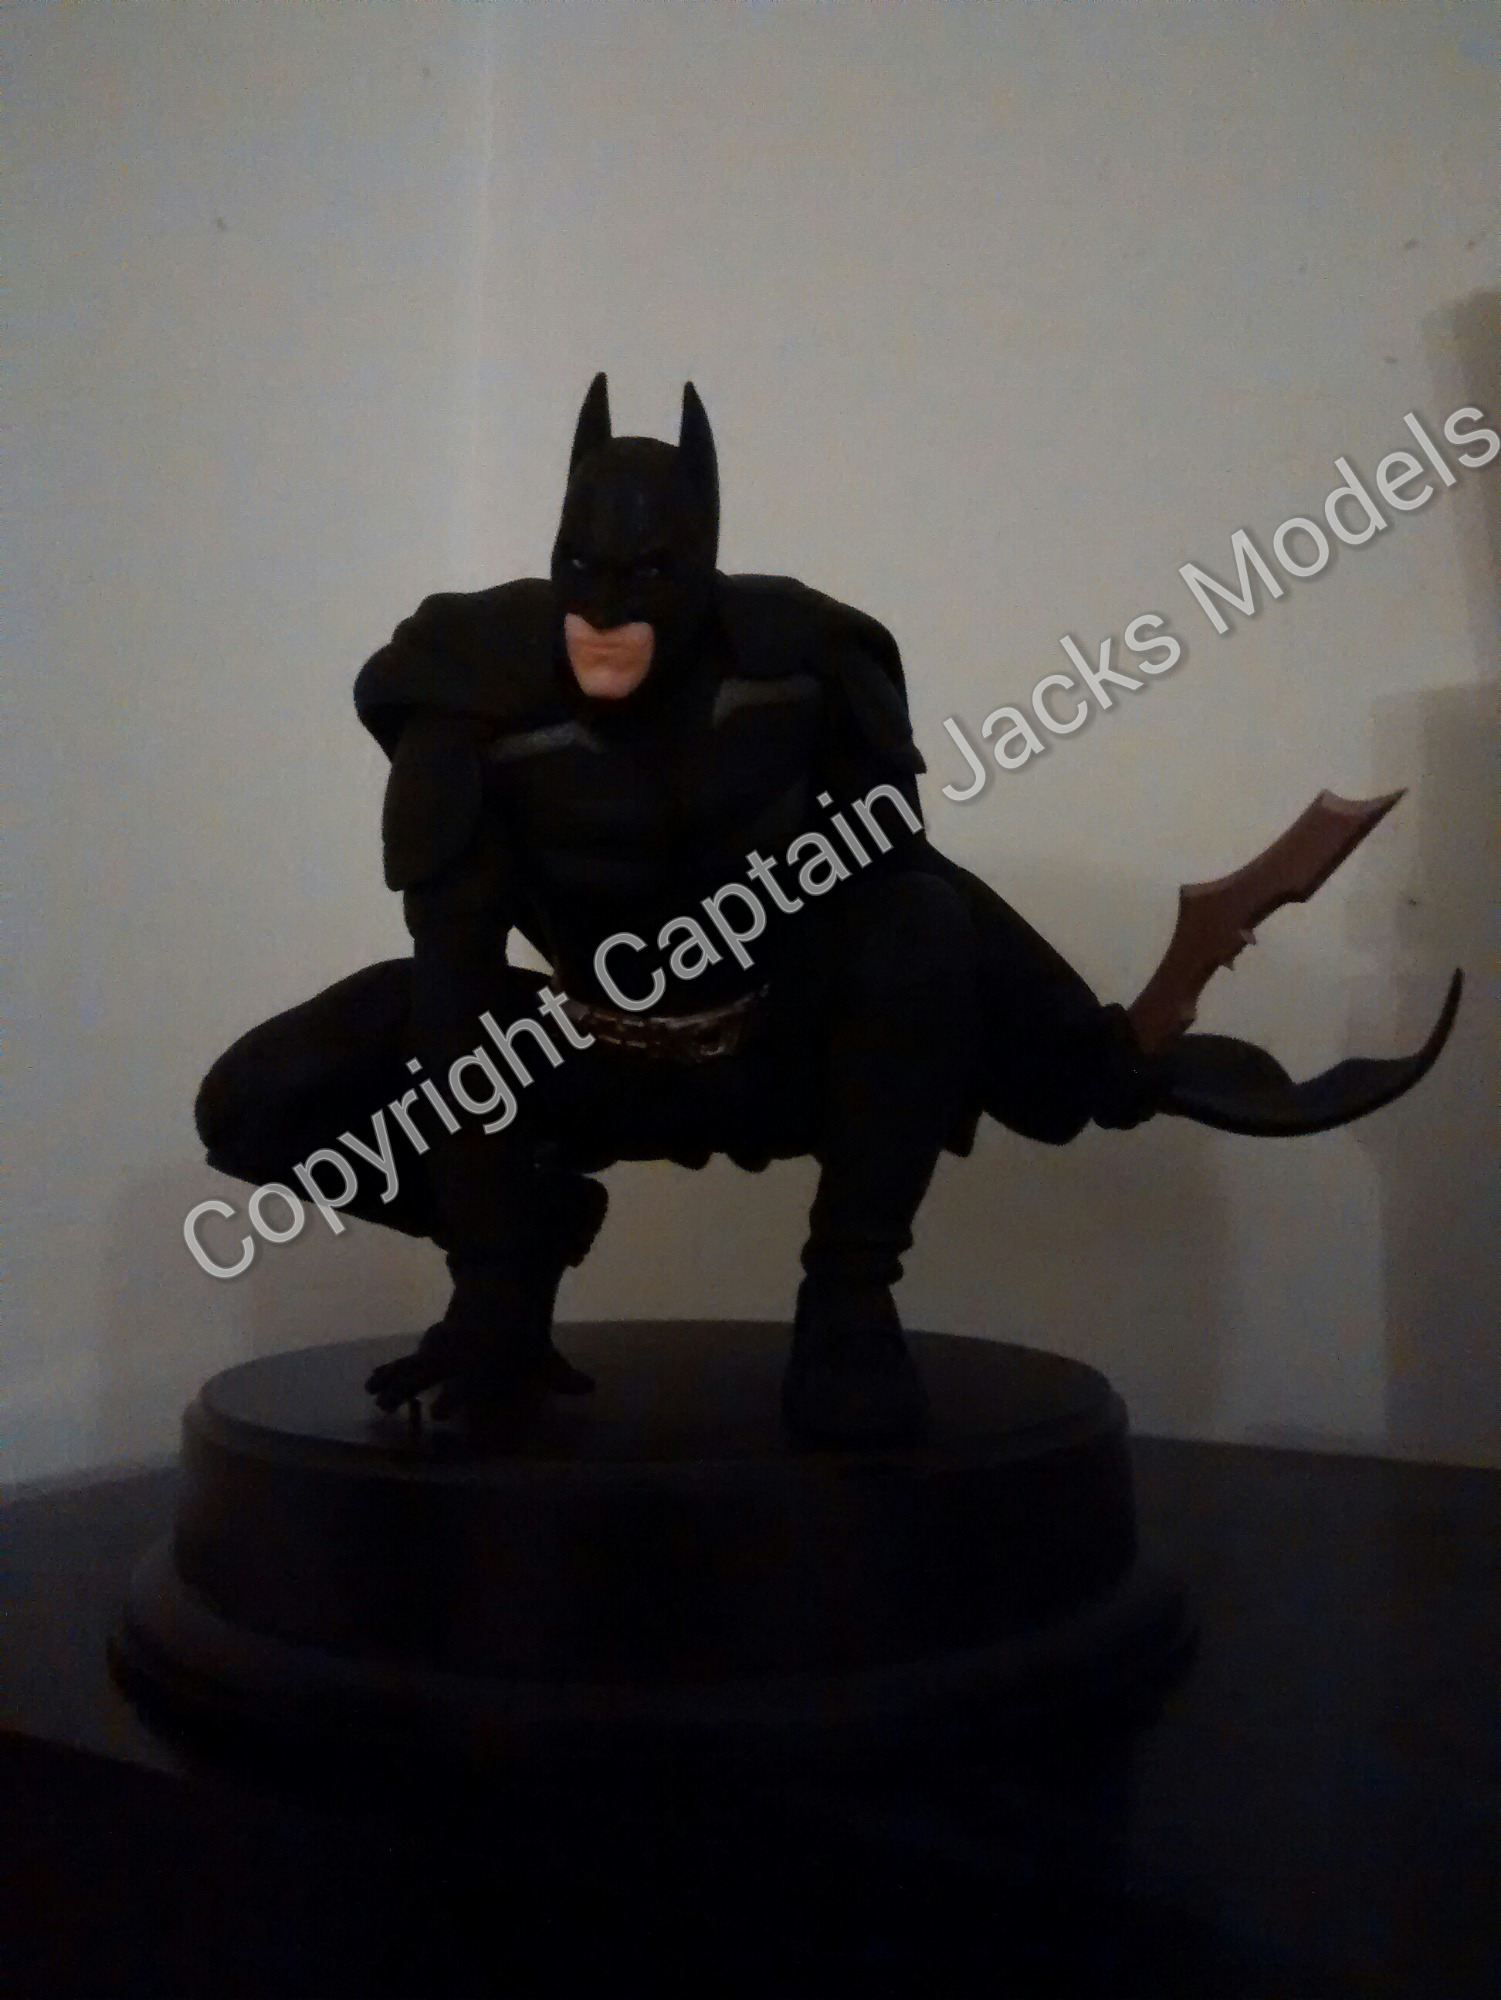
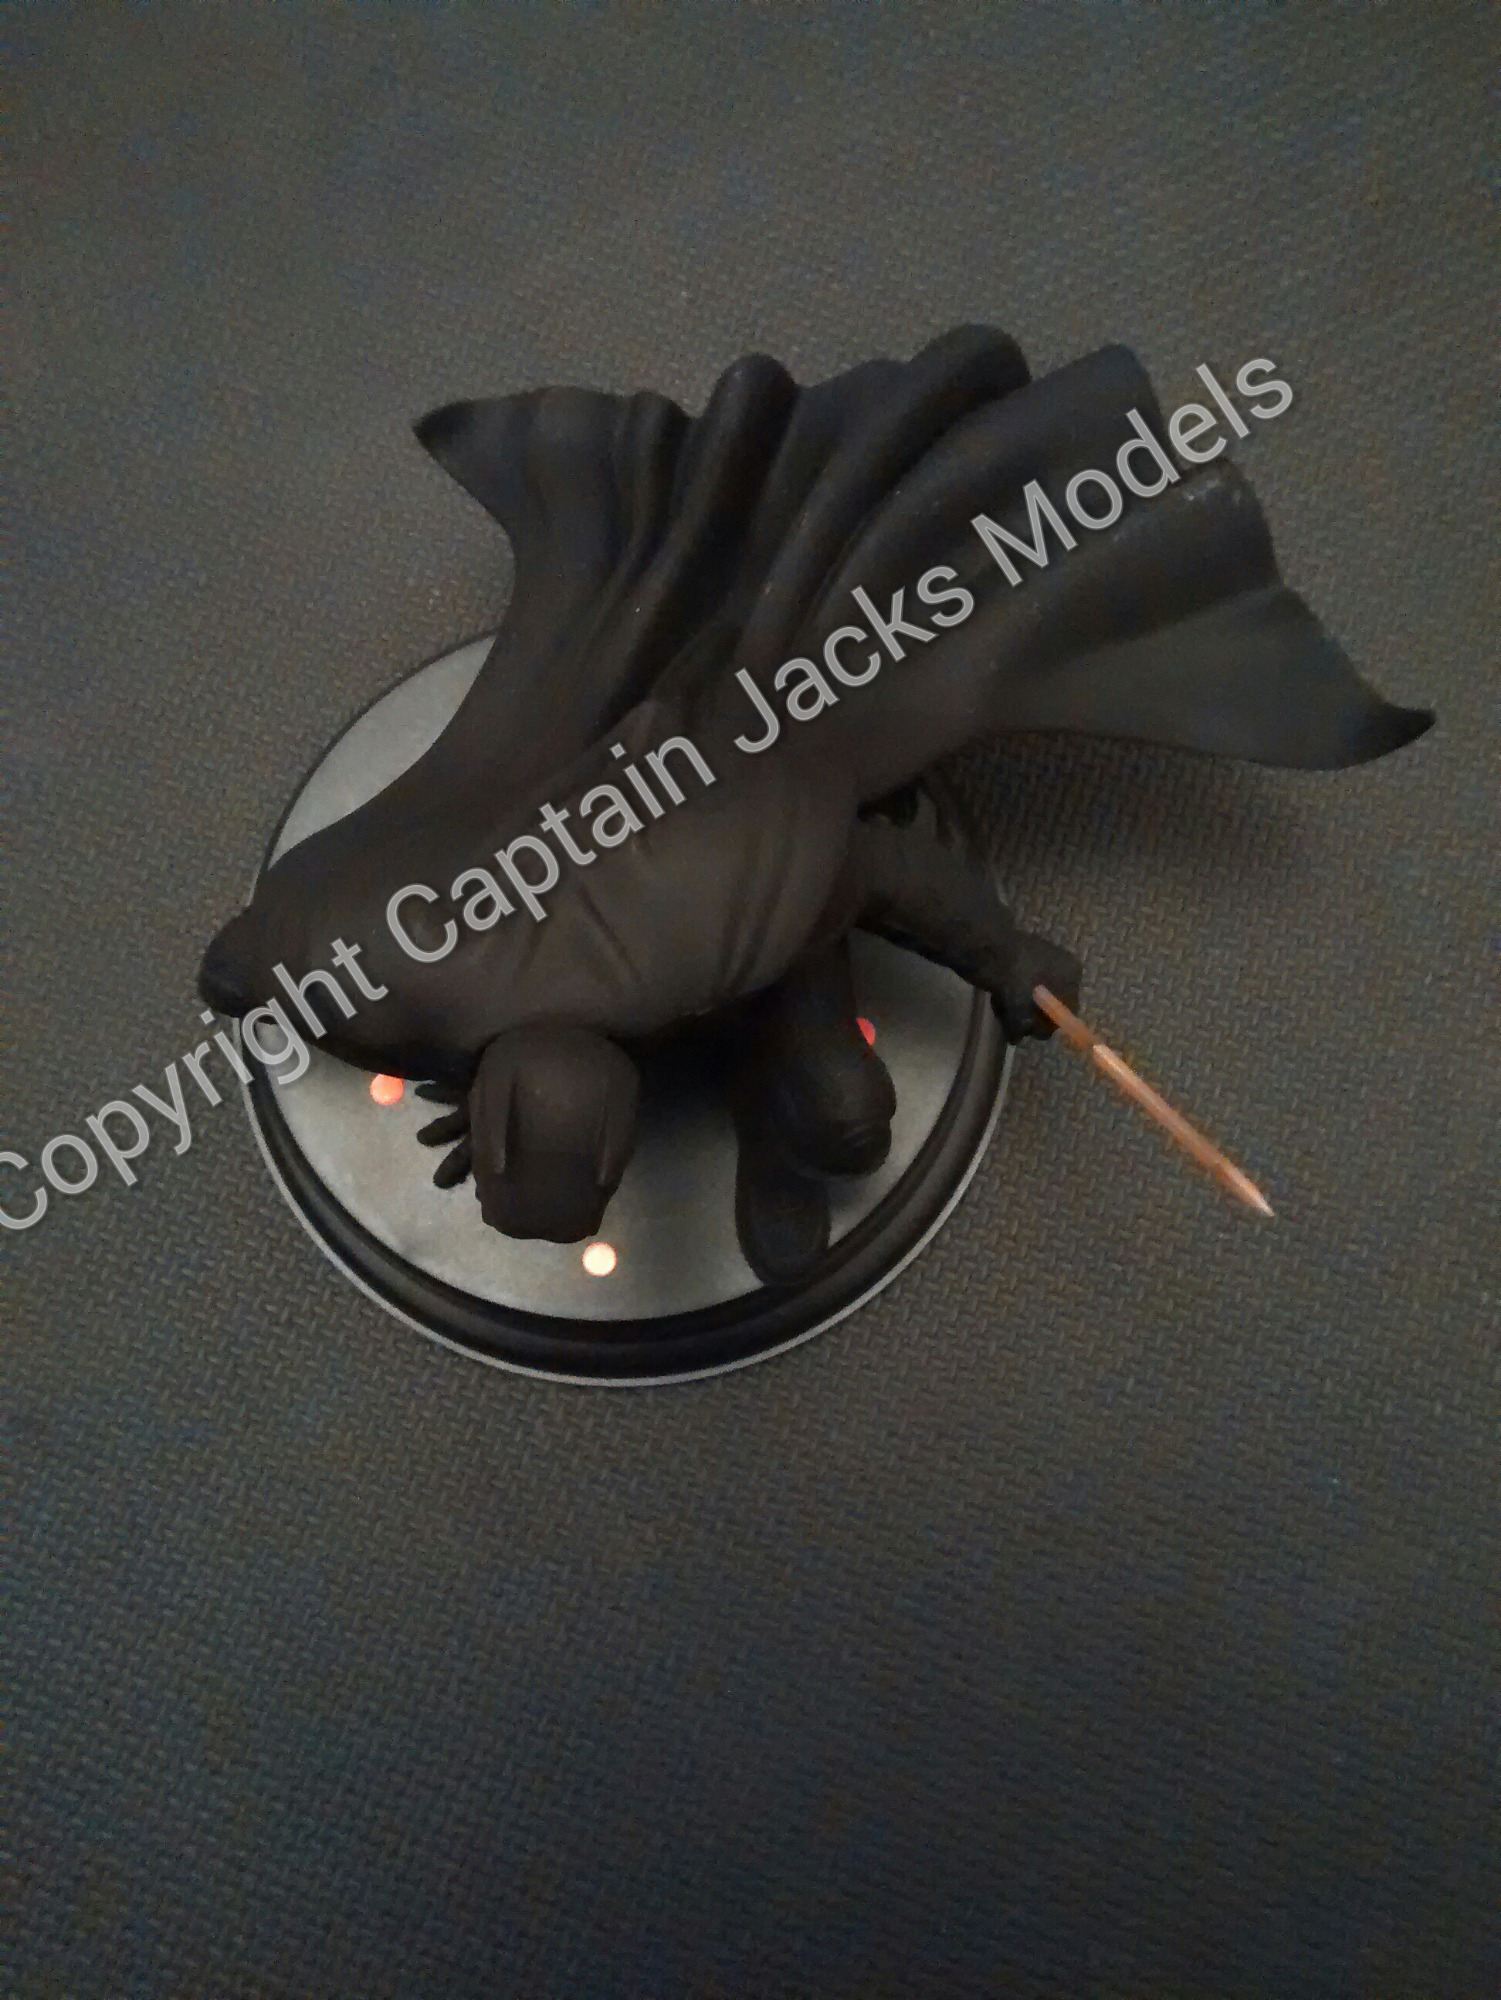
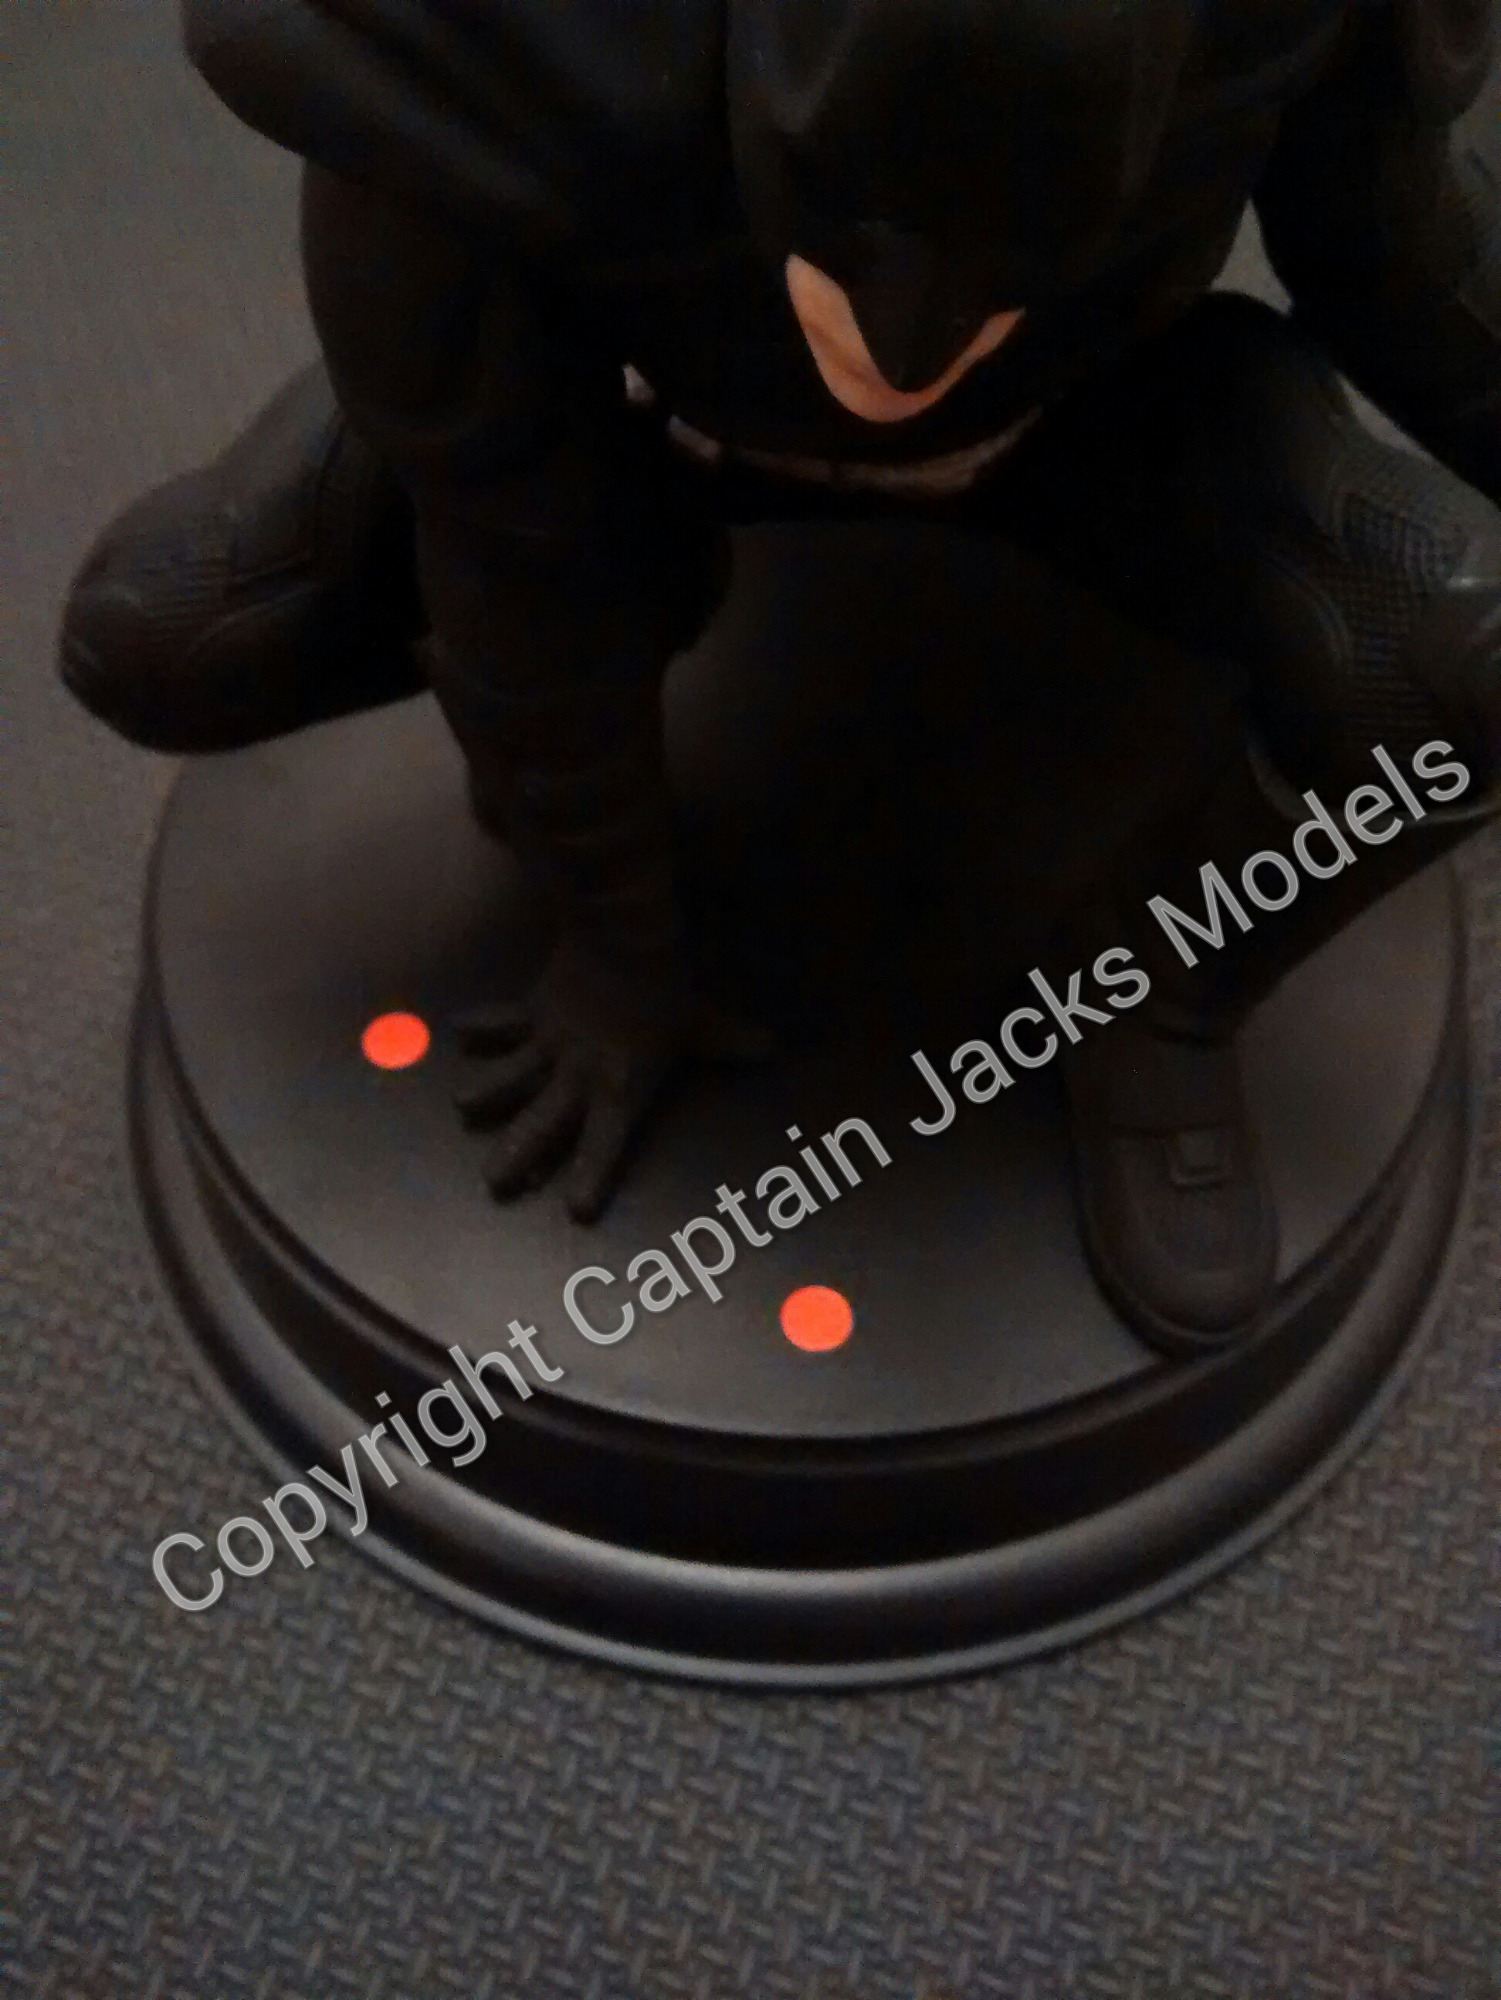
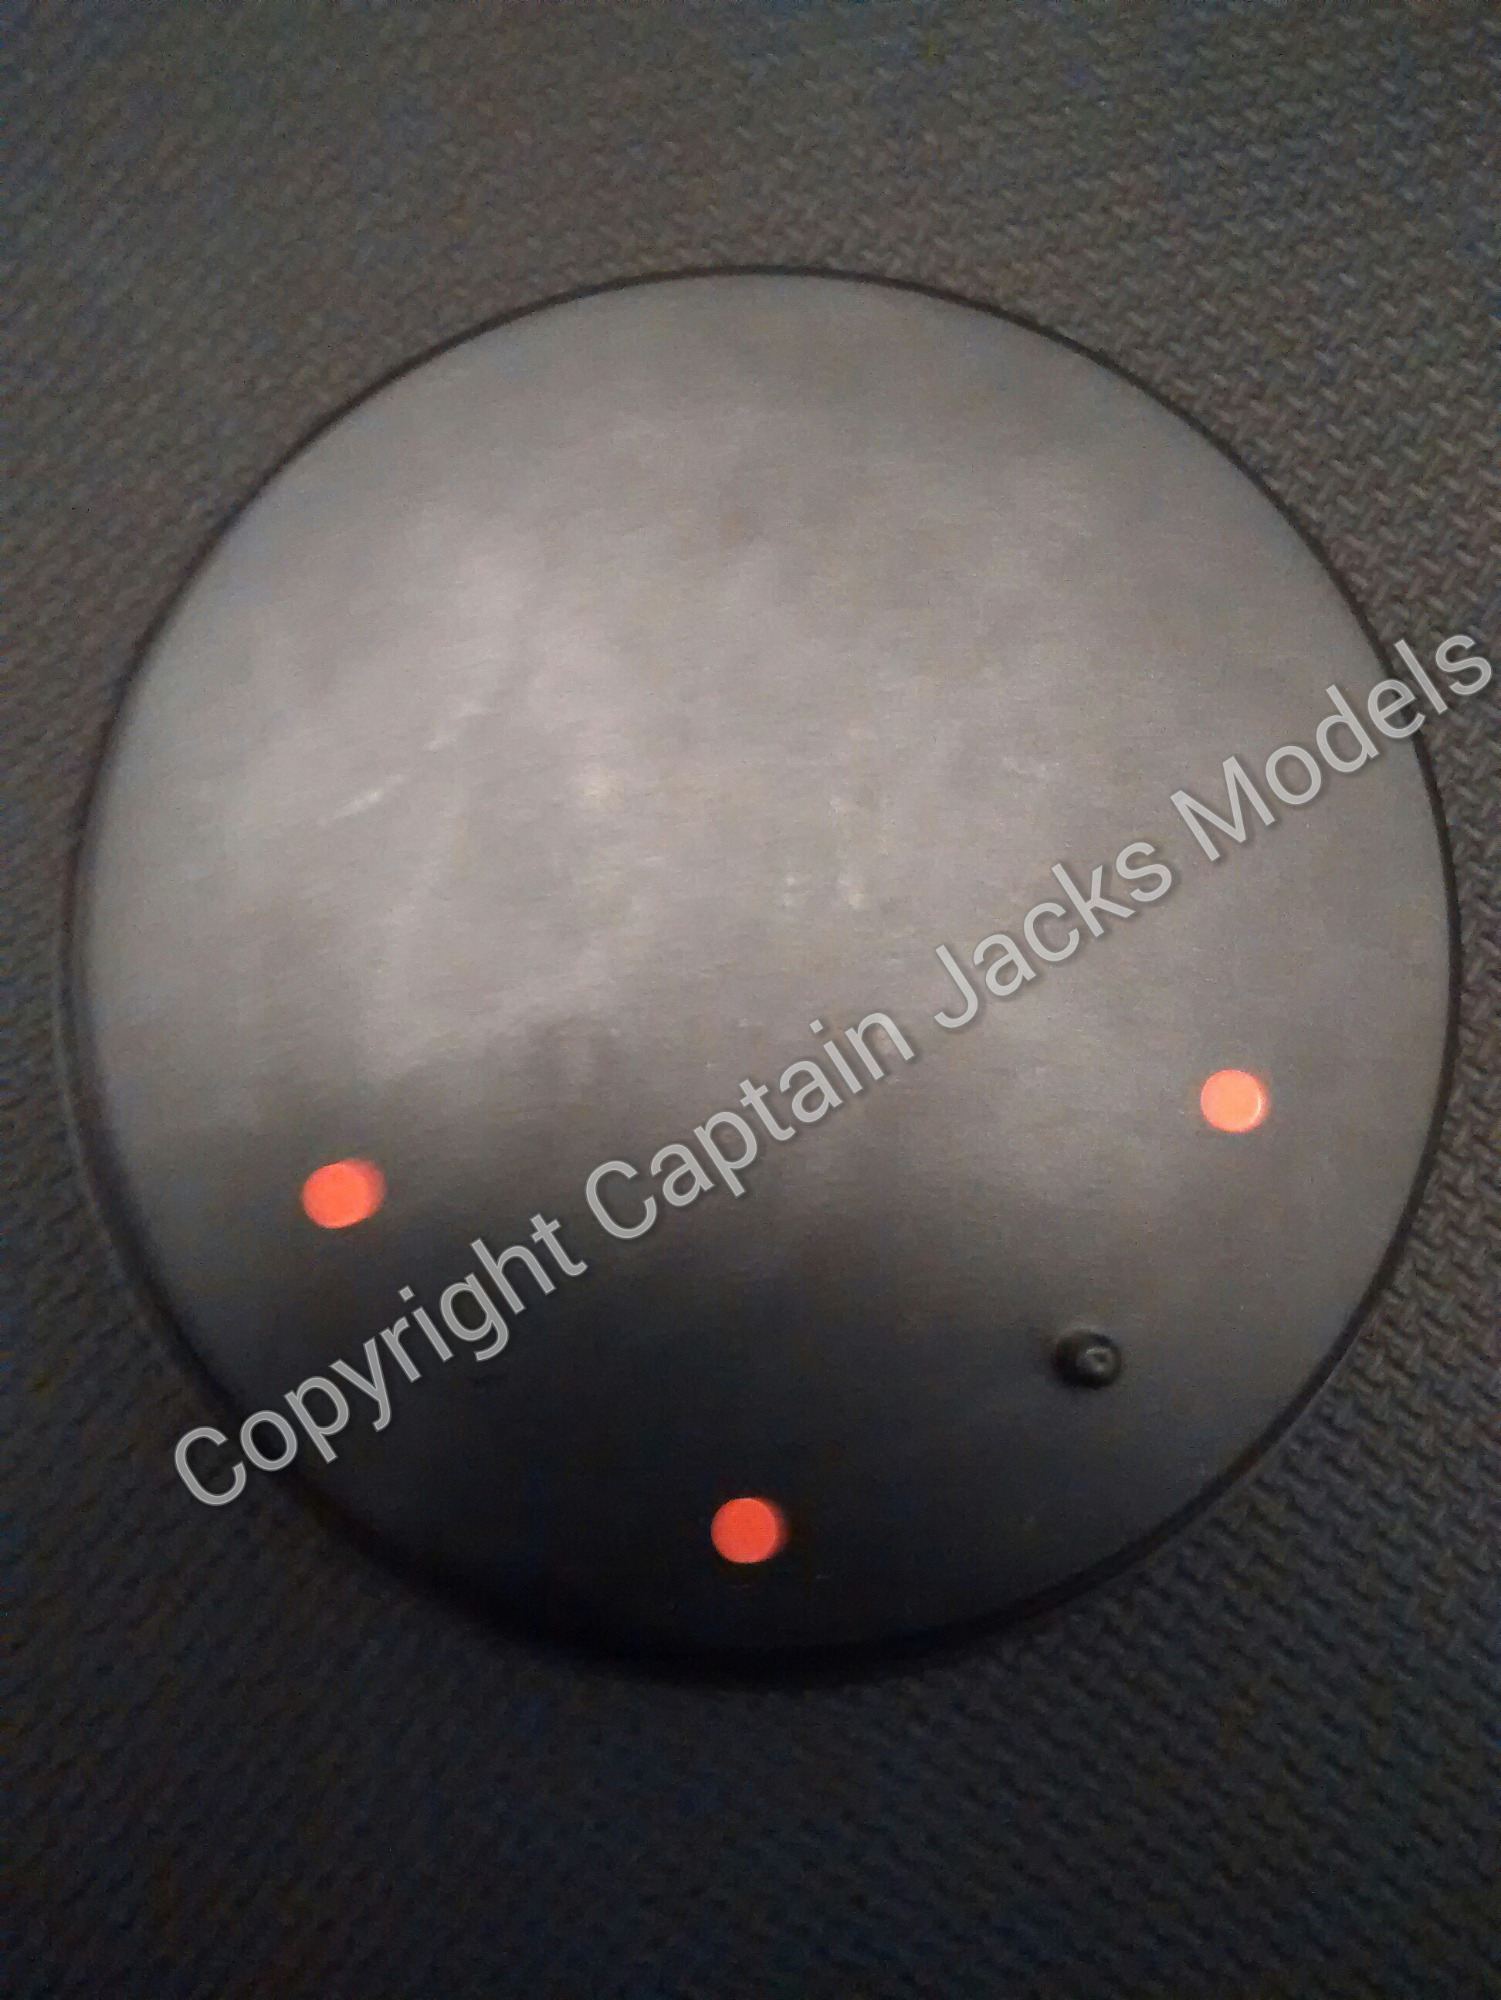
When you have assembled your Batman figure, place it on the display base provided with the kit. There is a small raised dot on the base where the fingers of the right hand should be positioned. From there we need to mark out the position of where each led needs to fit. The two ultra violets are positioned at either side of the model to give the blue-on-black effect. The warm white illuminates the figures face. Use your dot stickers to mark the positions of each led (see photos).

Step 2
When you are happy with each led position, ensure each marker sticker is firmly in place and remove the figure from the base. Although using stickers to mark the positions isn't essential, regular visitors to the site will know that this is my preferred way of doing this task. Firstly it provides an easy visual reference, and secondly - perhaps more importantly - helps provide a "key" for the drill bit.
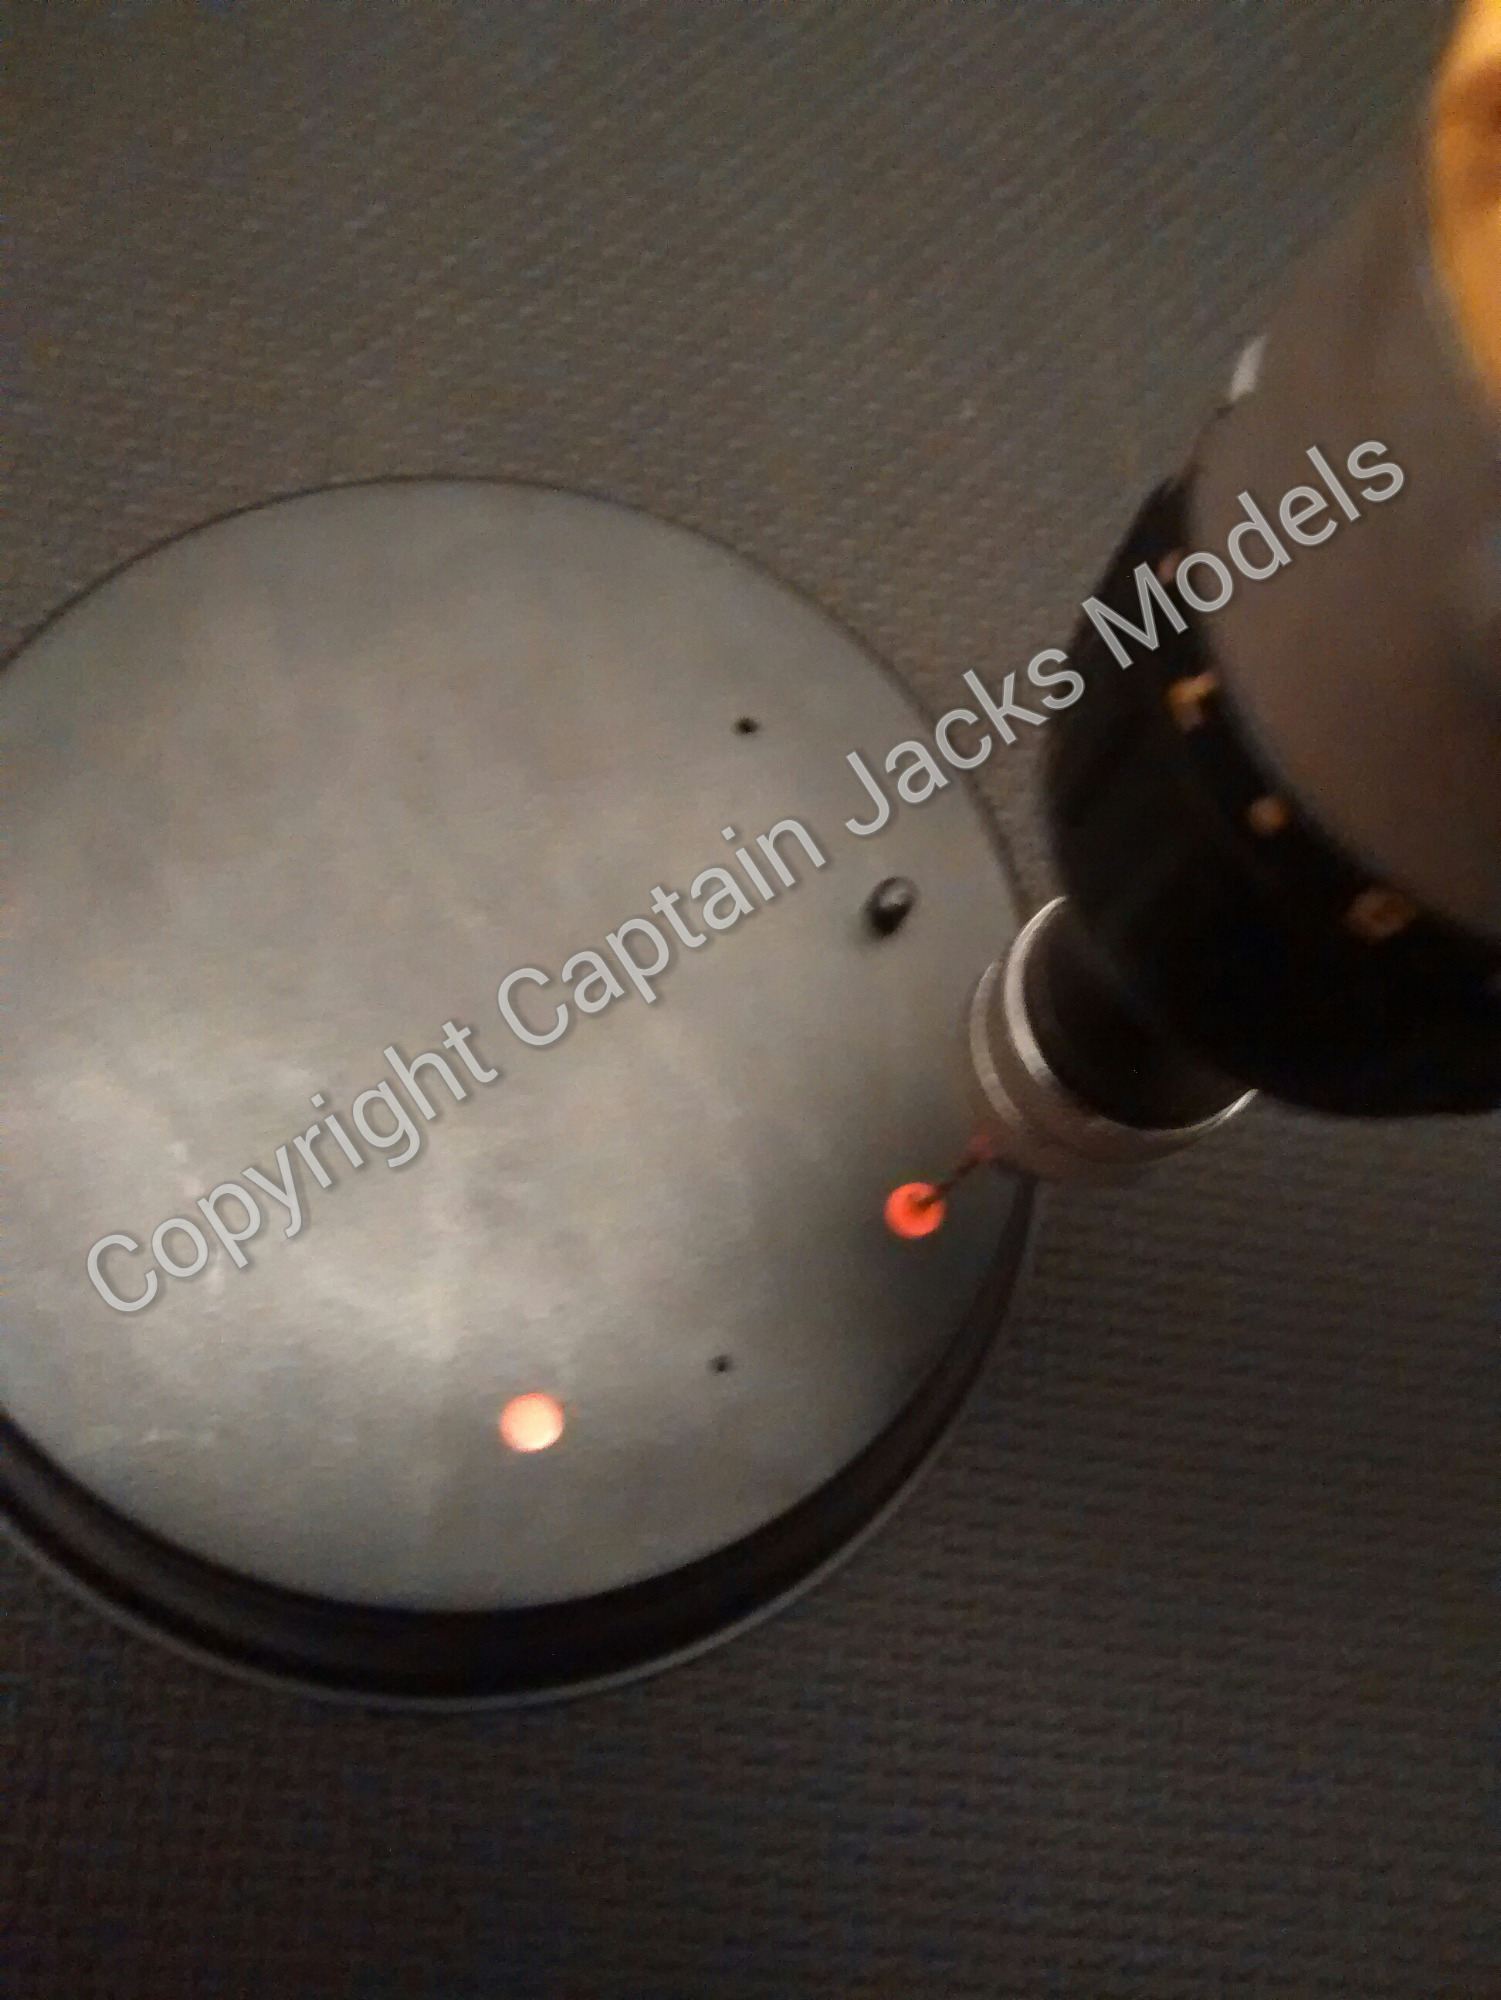
To drill the holes, first pre-drill each hole with the 2mm drill. The final diameter for each hole needs to be 5mm, but don't attempt to drill this in one go using the 5mm drill - you risk splitting the plastic base. Take your time, and using the 2mm drill, pre-drill each hole using the weight of the drill itself as the downward force. When done, widen each hole to 5mm diameter.
Don't be afraid to connect the battery to the light kit, and position the leds underneath the model to experiment with the different lighting effects that you can get.
Remember, as with all the projects, this is your model build - and there isn't only one way of doing things.
Try your own ideas and experiment with different effects!
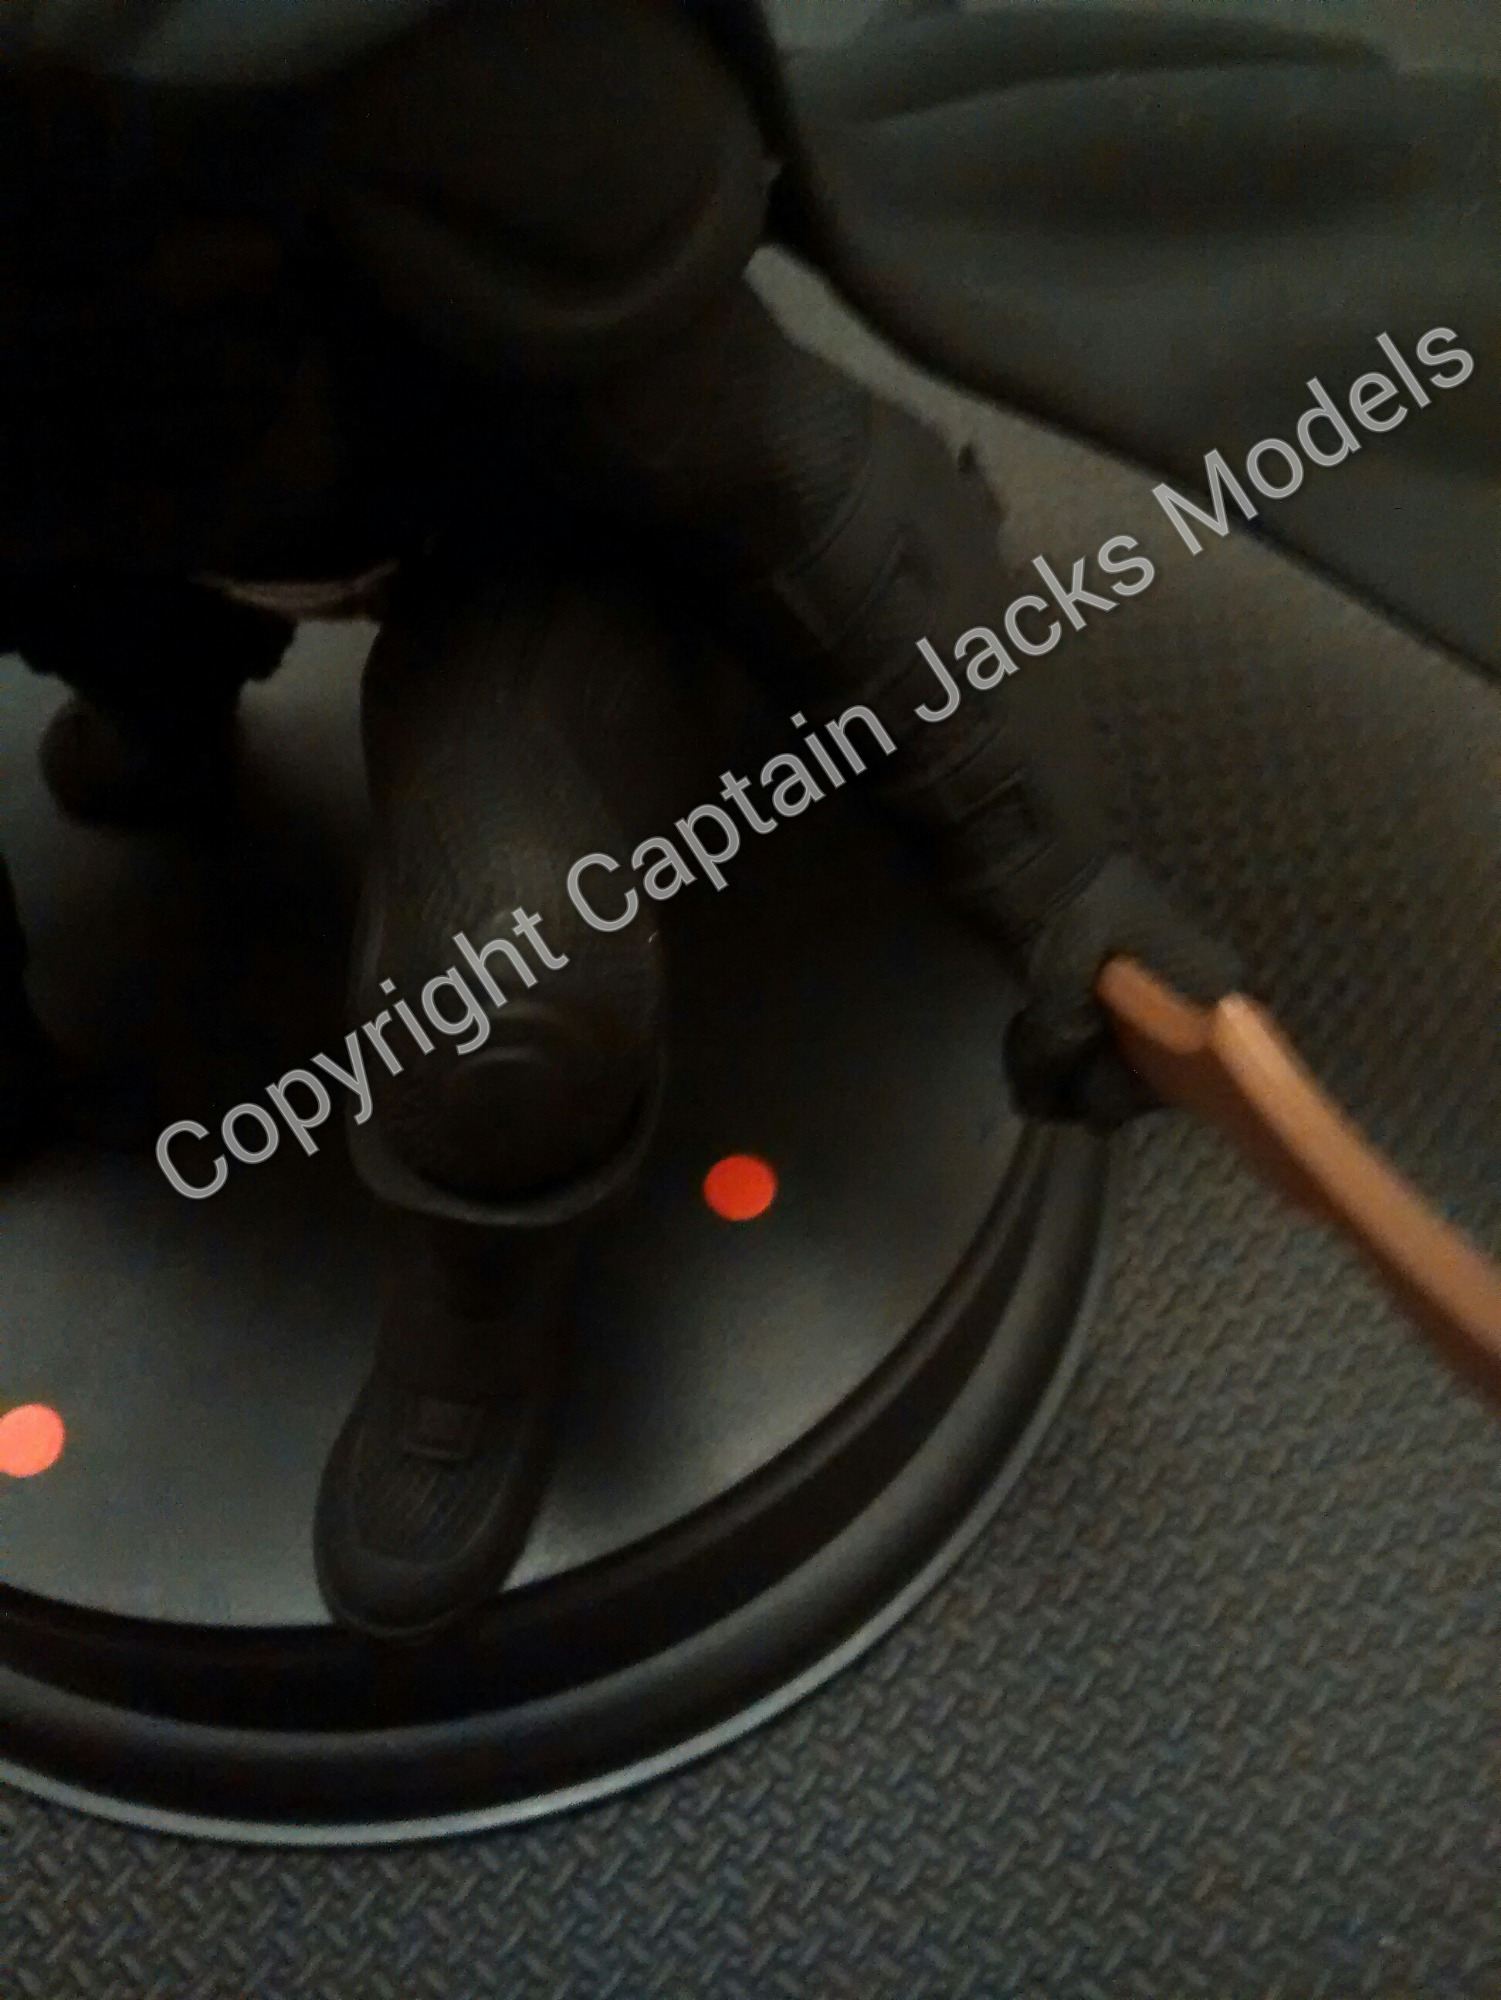
A great tip to make positioning the lights easy - ensure the model is in the correct place, and then use either a pencil or screwdriver to show where on the model each led light beam will hit. For example, the warm white led is to illuminate the figures face, so position the pencil in front of the figures face, running down to the base, to get the most accurate placement.

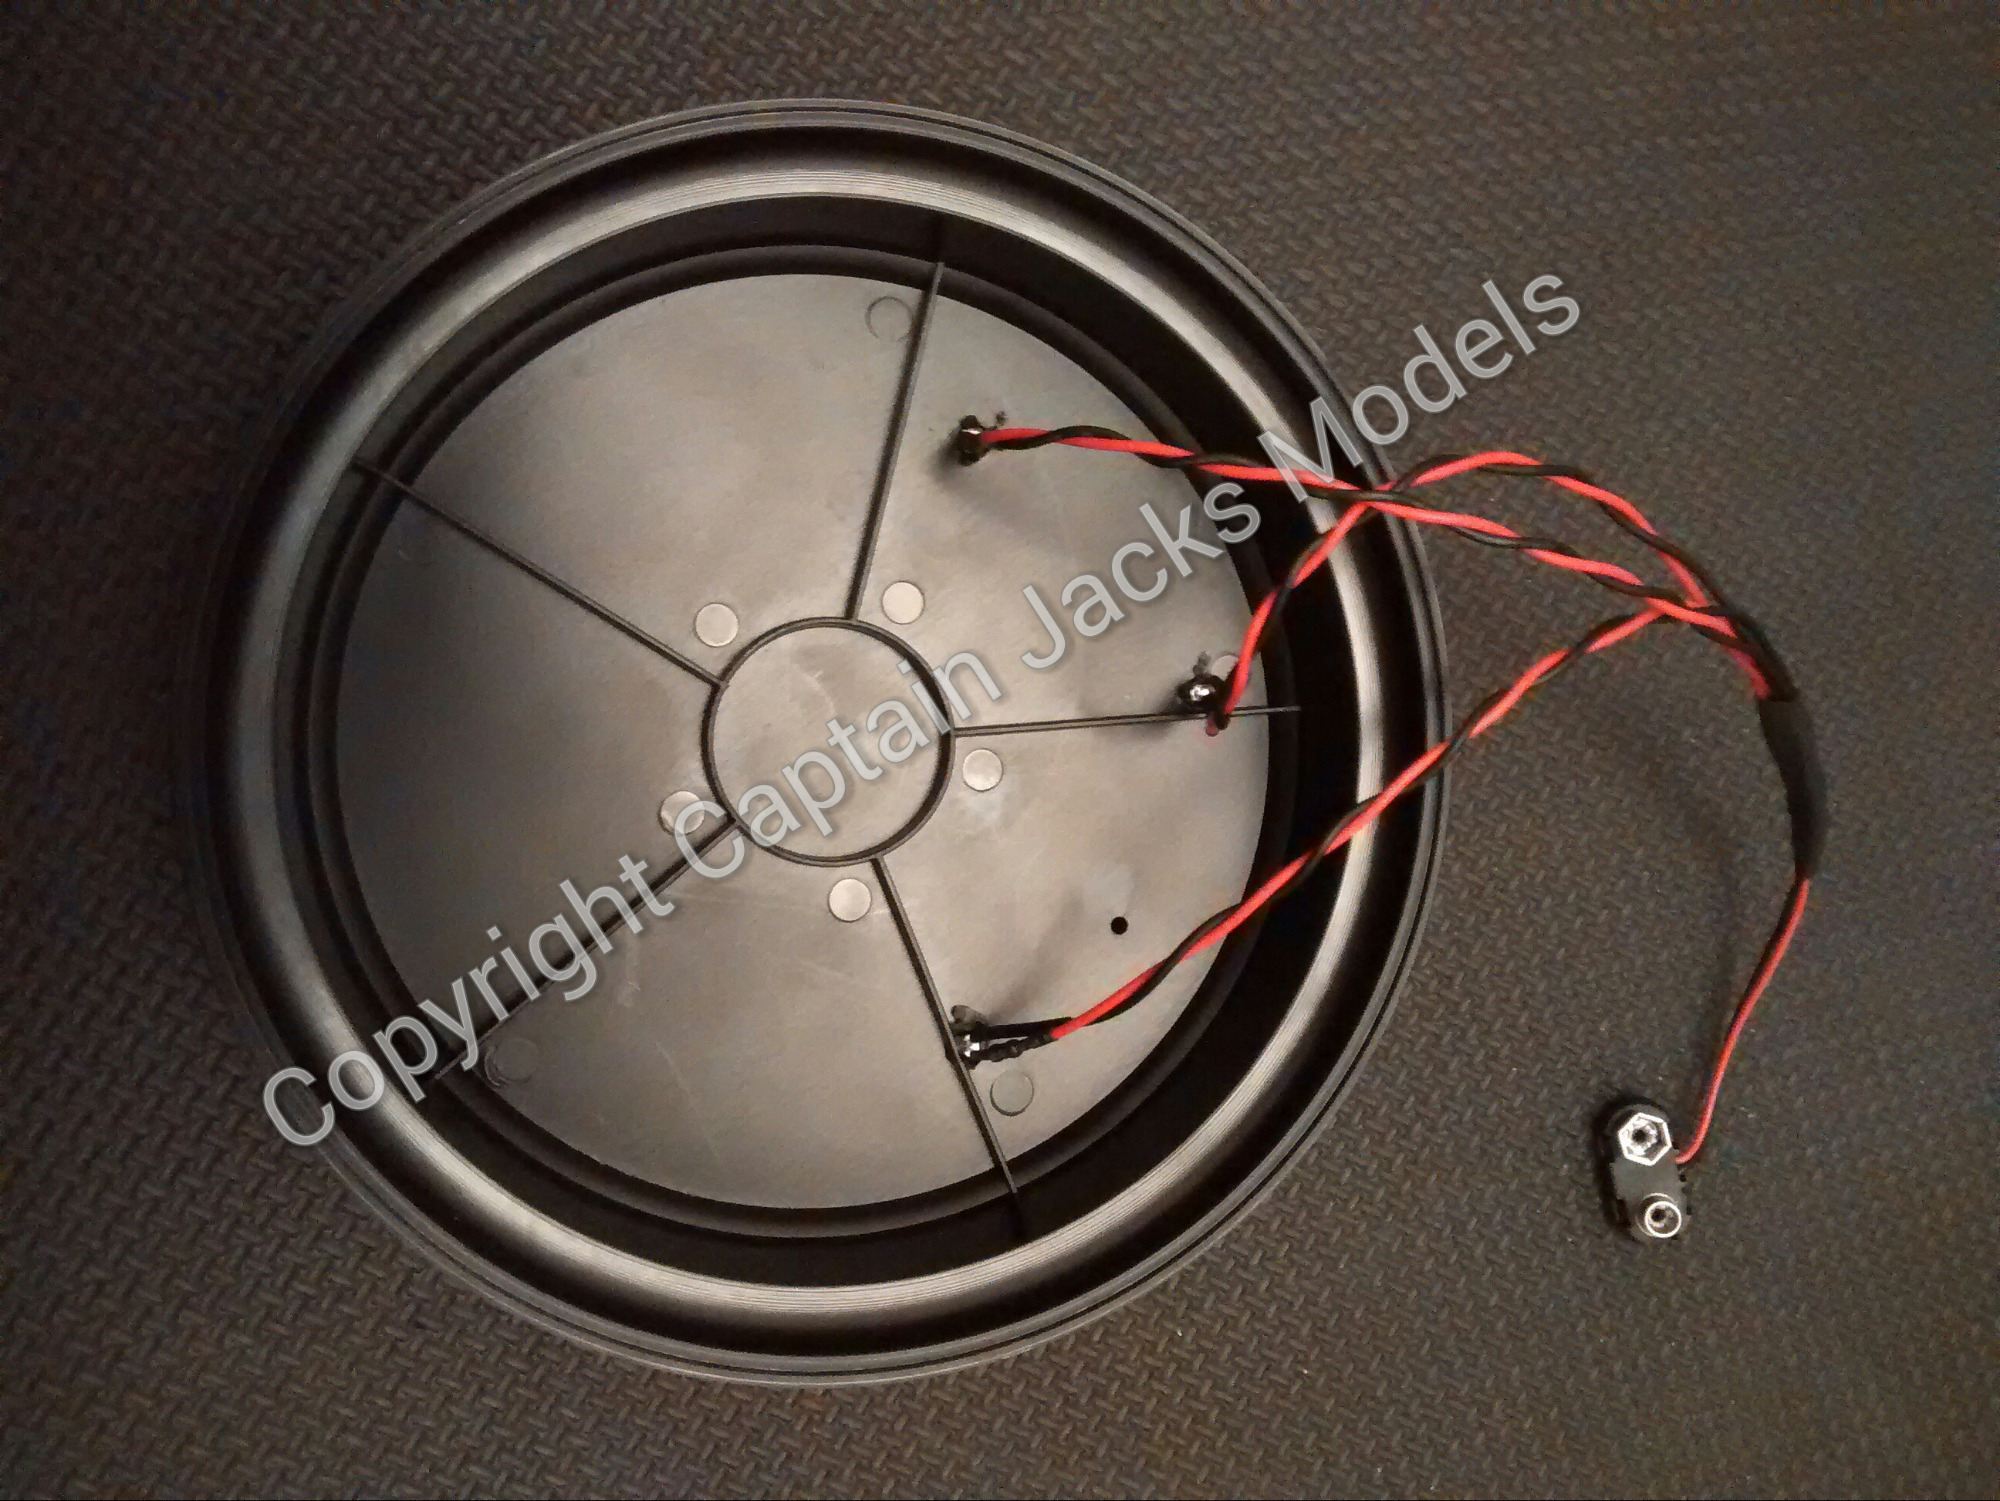
When the 5mm holes are drilled, insert the plastic led clips into each one, and push them fully into place.
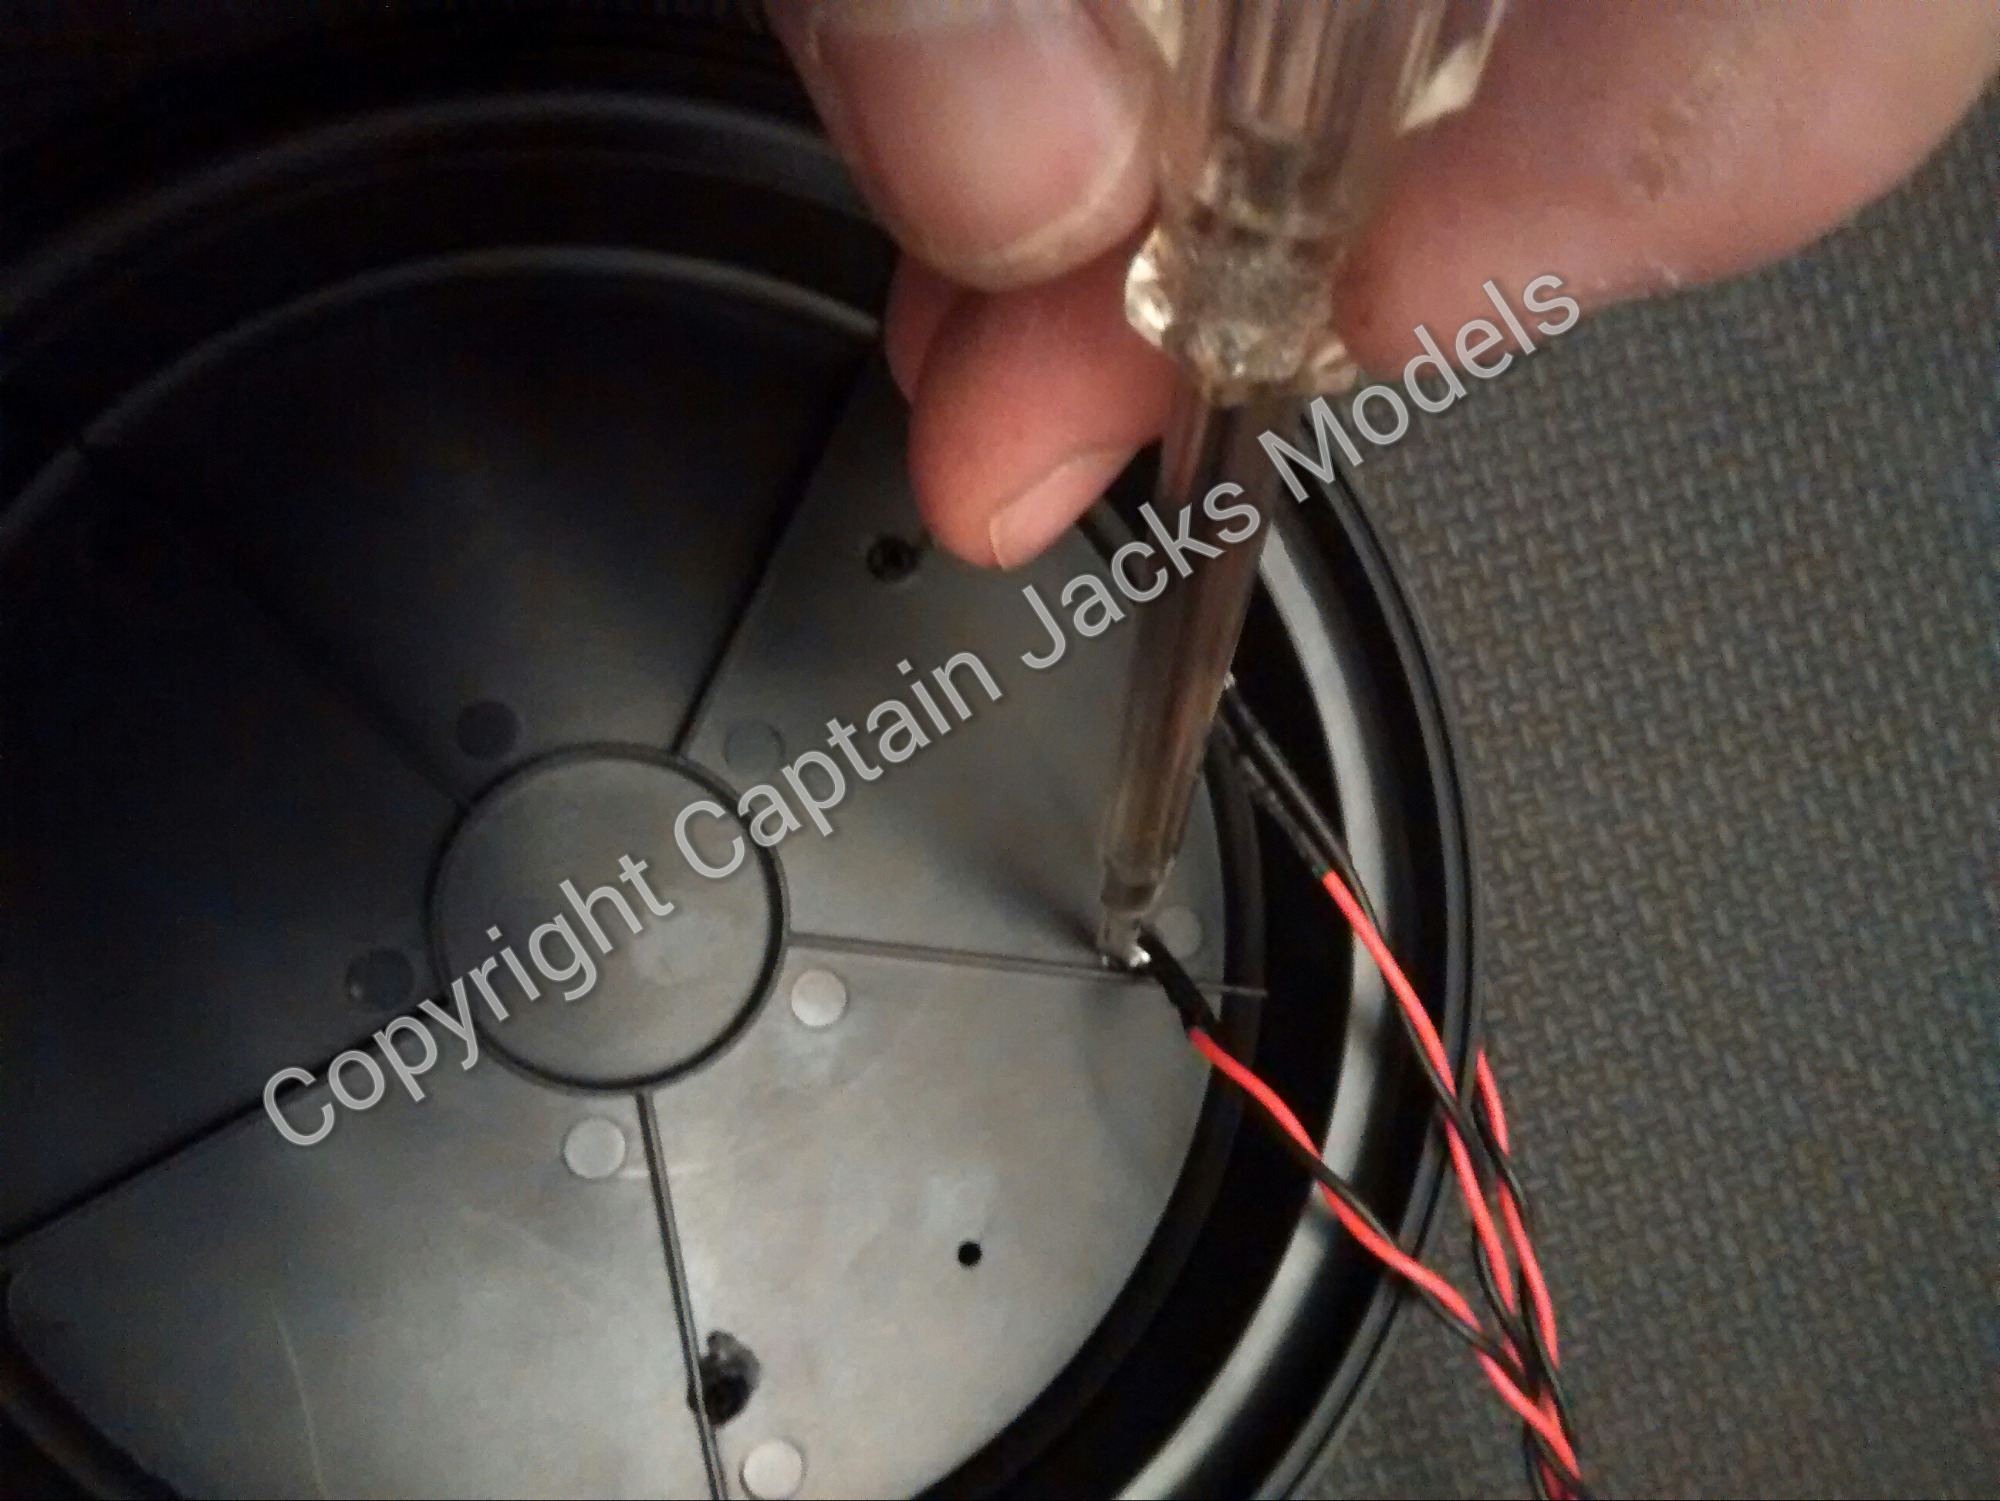
Step 3
Turn the model base over, and loosely place each led in position in the fitting clip. Do not try to push the leds into place using the wires, as this risks breaking the connections. Instead, use a flat blade scewdriver to push each led firmly into their holders, placing the blade of the screwdriver between the led wires - see photo.
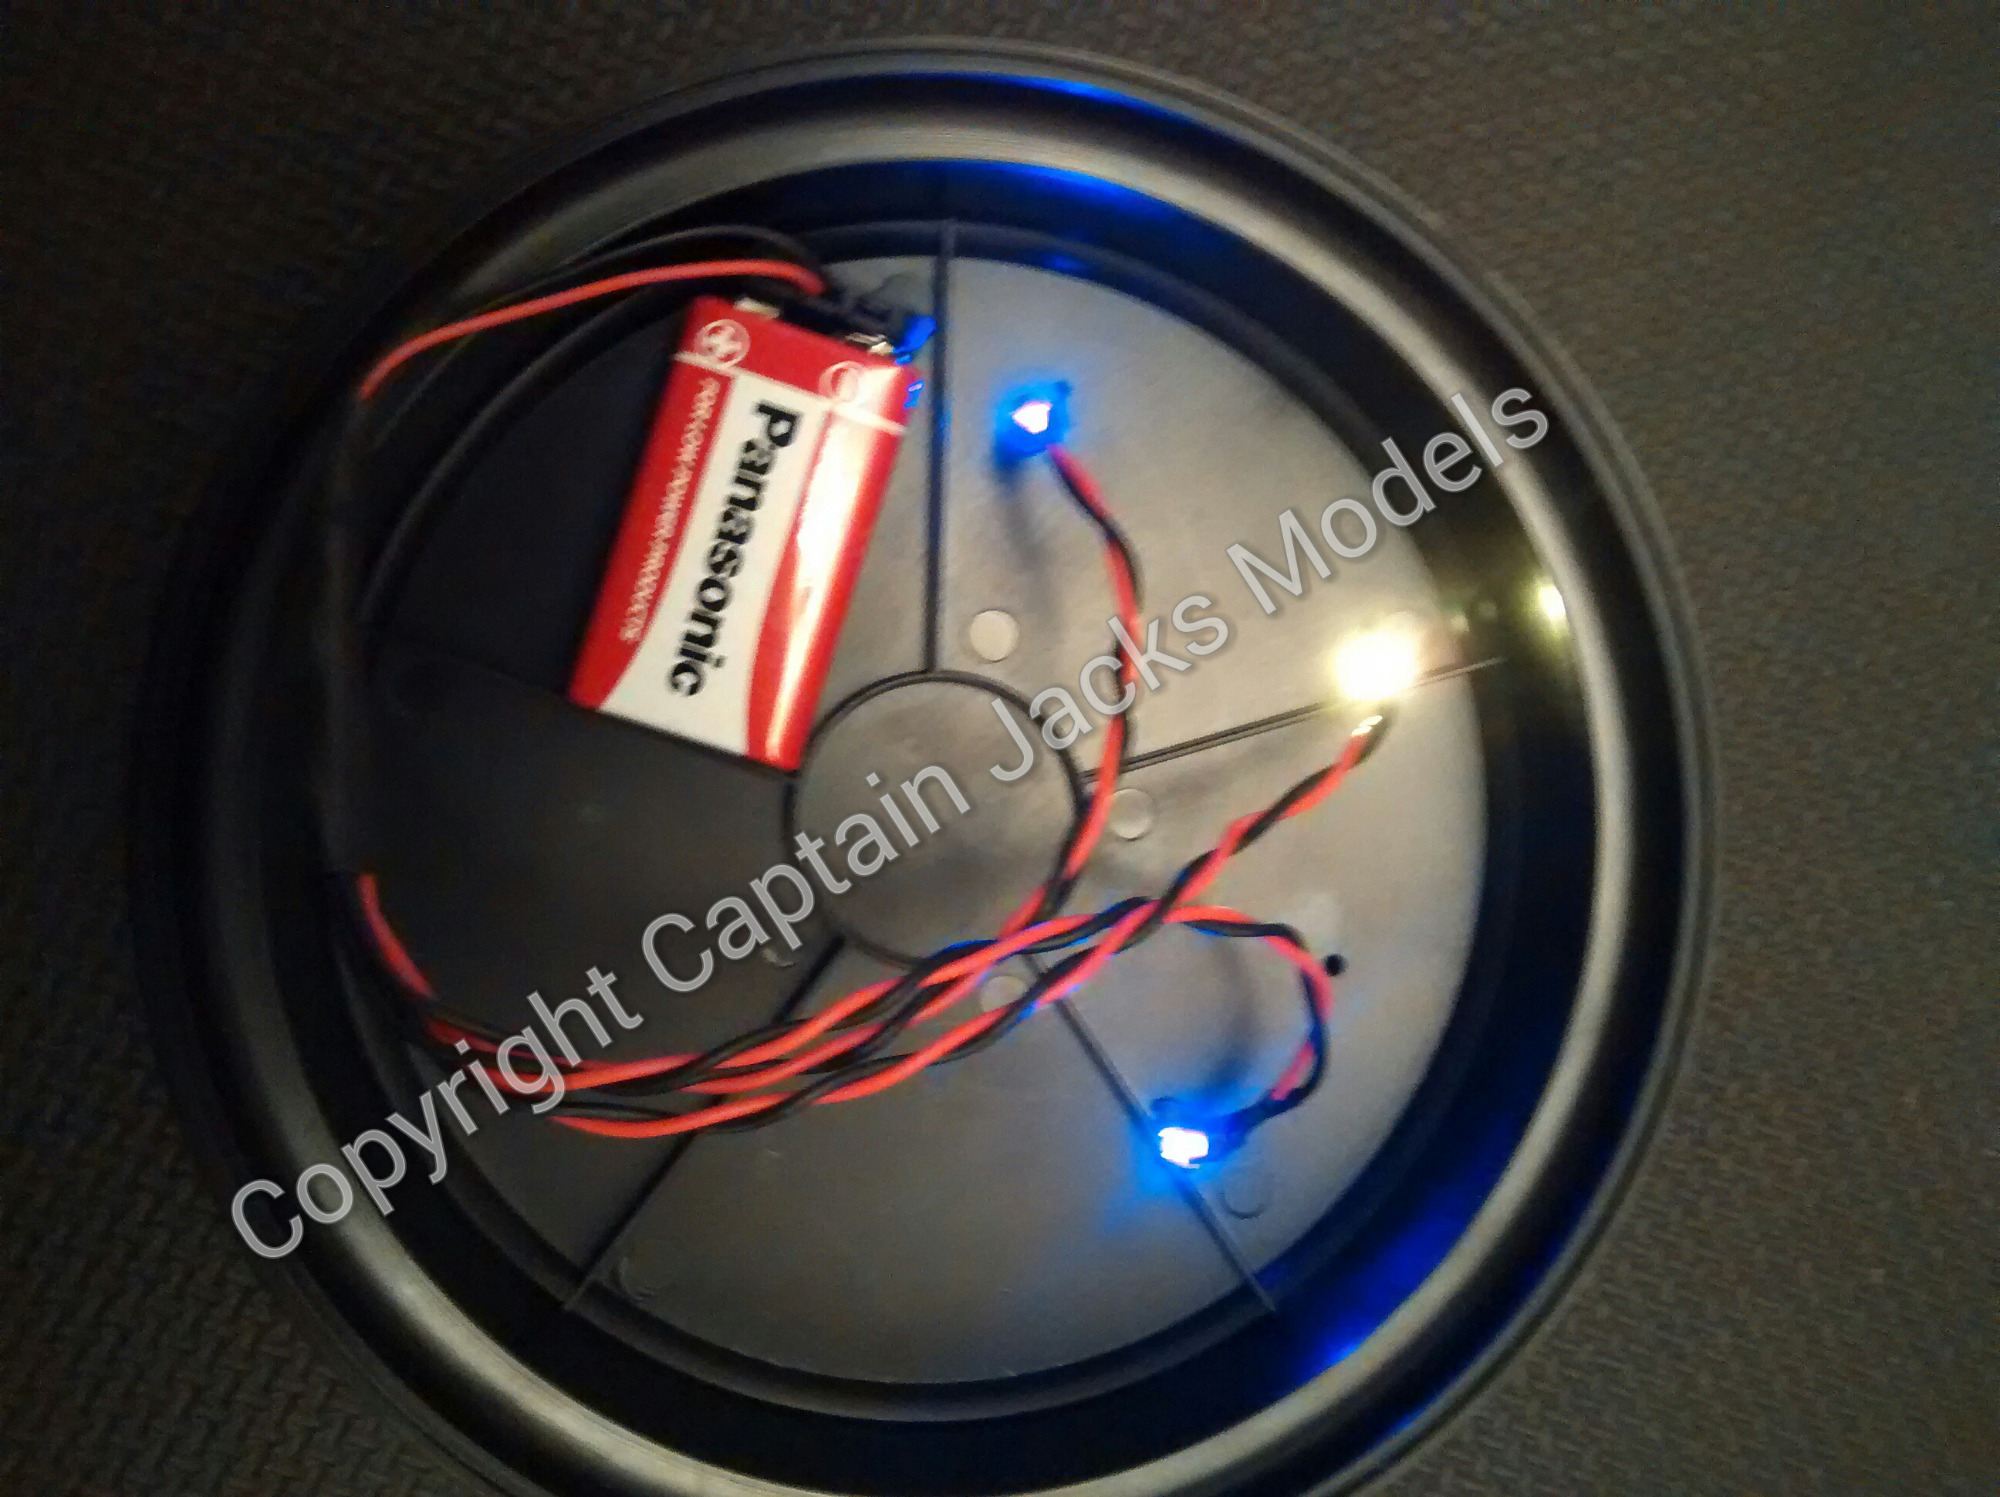
All done!
Add the 9v battery, turn the base over and re-fit the figure. As you can see, the lighting really enhances this particular model - and now you know how to get Batman "blues" as an effect for future projects :)